.png)
Team-Managed Project Configuration
Projects in Jira can be created as either team-managed or company-managed (formerly next-gen and classic). There are some key differences between them. To fit team-managed Jira project, user is required to complete some configurations specifically for it.
Before doing these configuration settings, you need finish following Jira project settings first:
Creating an issue type which will be used as ‘Test Case’ in TestRay app
Creating an issue type which will be used as ‘Test Plan’ in TestRay app
Creating issue type/s which will be used as ‘Requirement’ in TestRay app
Creating issue type/s which will be used as ‘Defect’ in TestRay app
Creating project role/s which will be mapped to TestRay roles: Tester, Test Lead
Once above prerequisite is done, then we can go for TestRay configuration: Tests->Project Settings->General TAB
Please note that it requires 'Administer Projects' permission (Jira) to view this feature.
Initializing Project Scheme
If it is the first time to touch the settings, you need ‘Initialize’ it first, it will read the Global Settings information and prepare the configurable items.
Project Settings is usually a subset of System Configuration , user is allowed to remove/disable some items from .
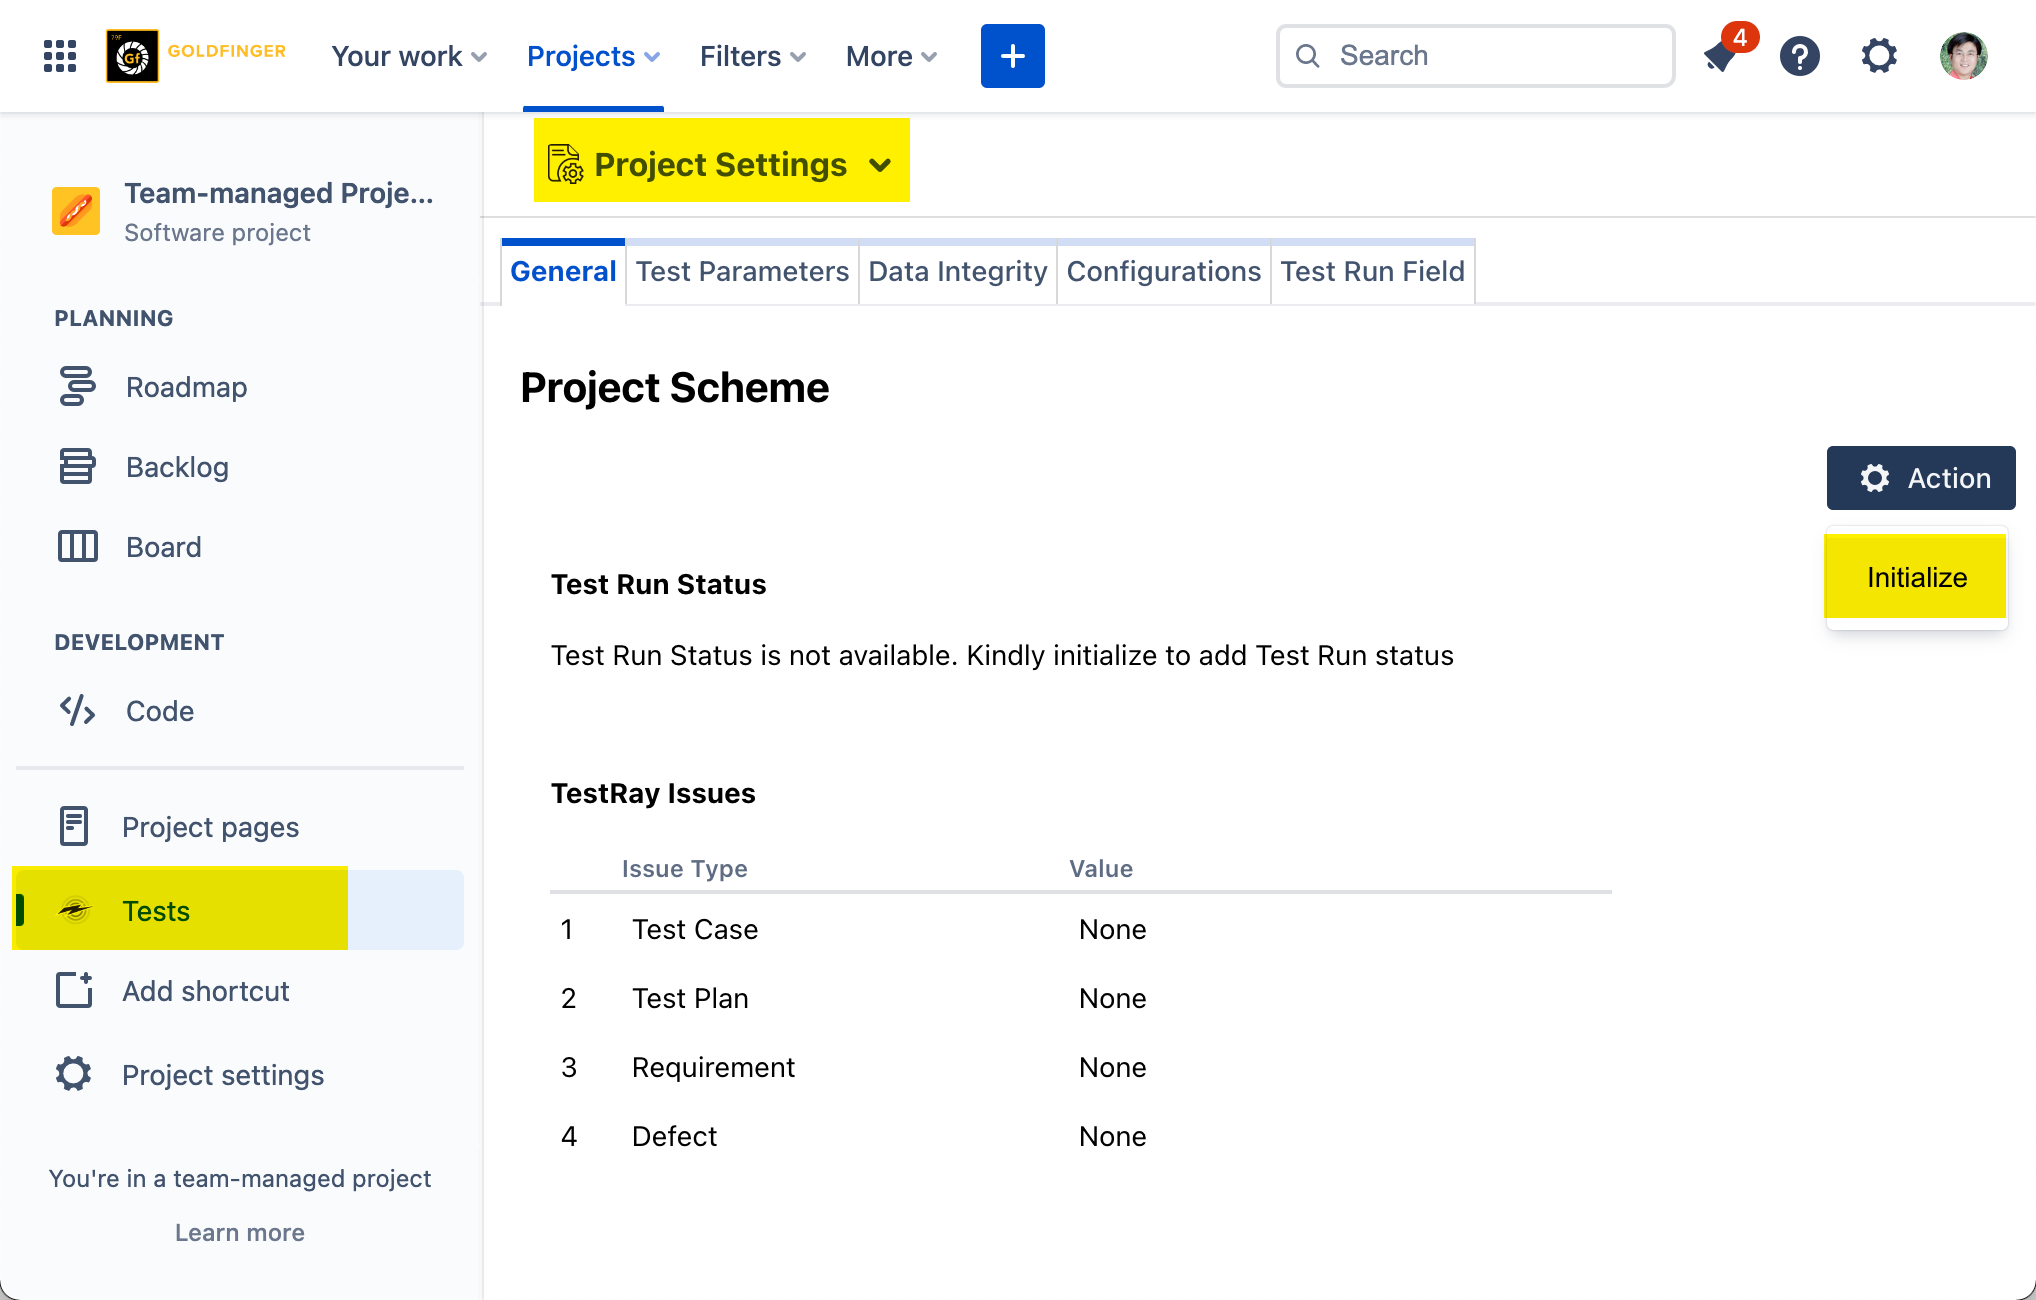
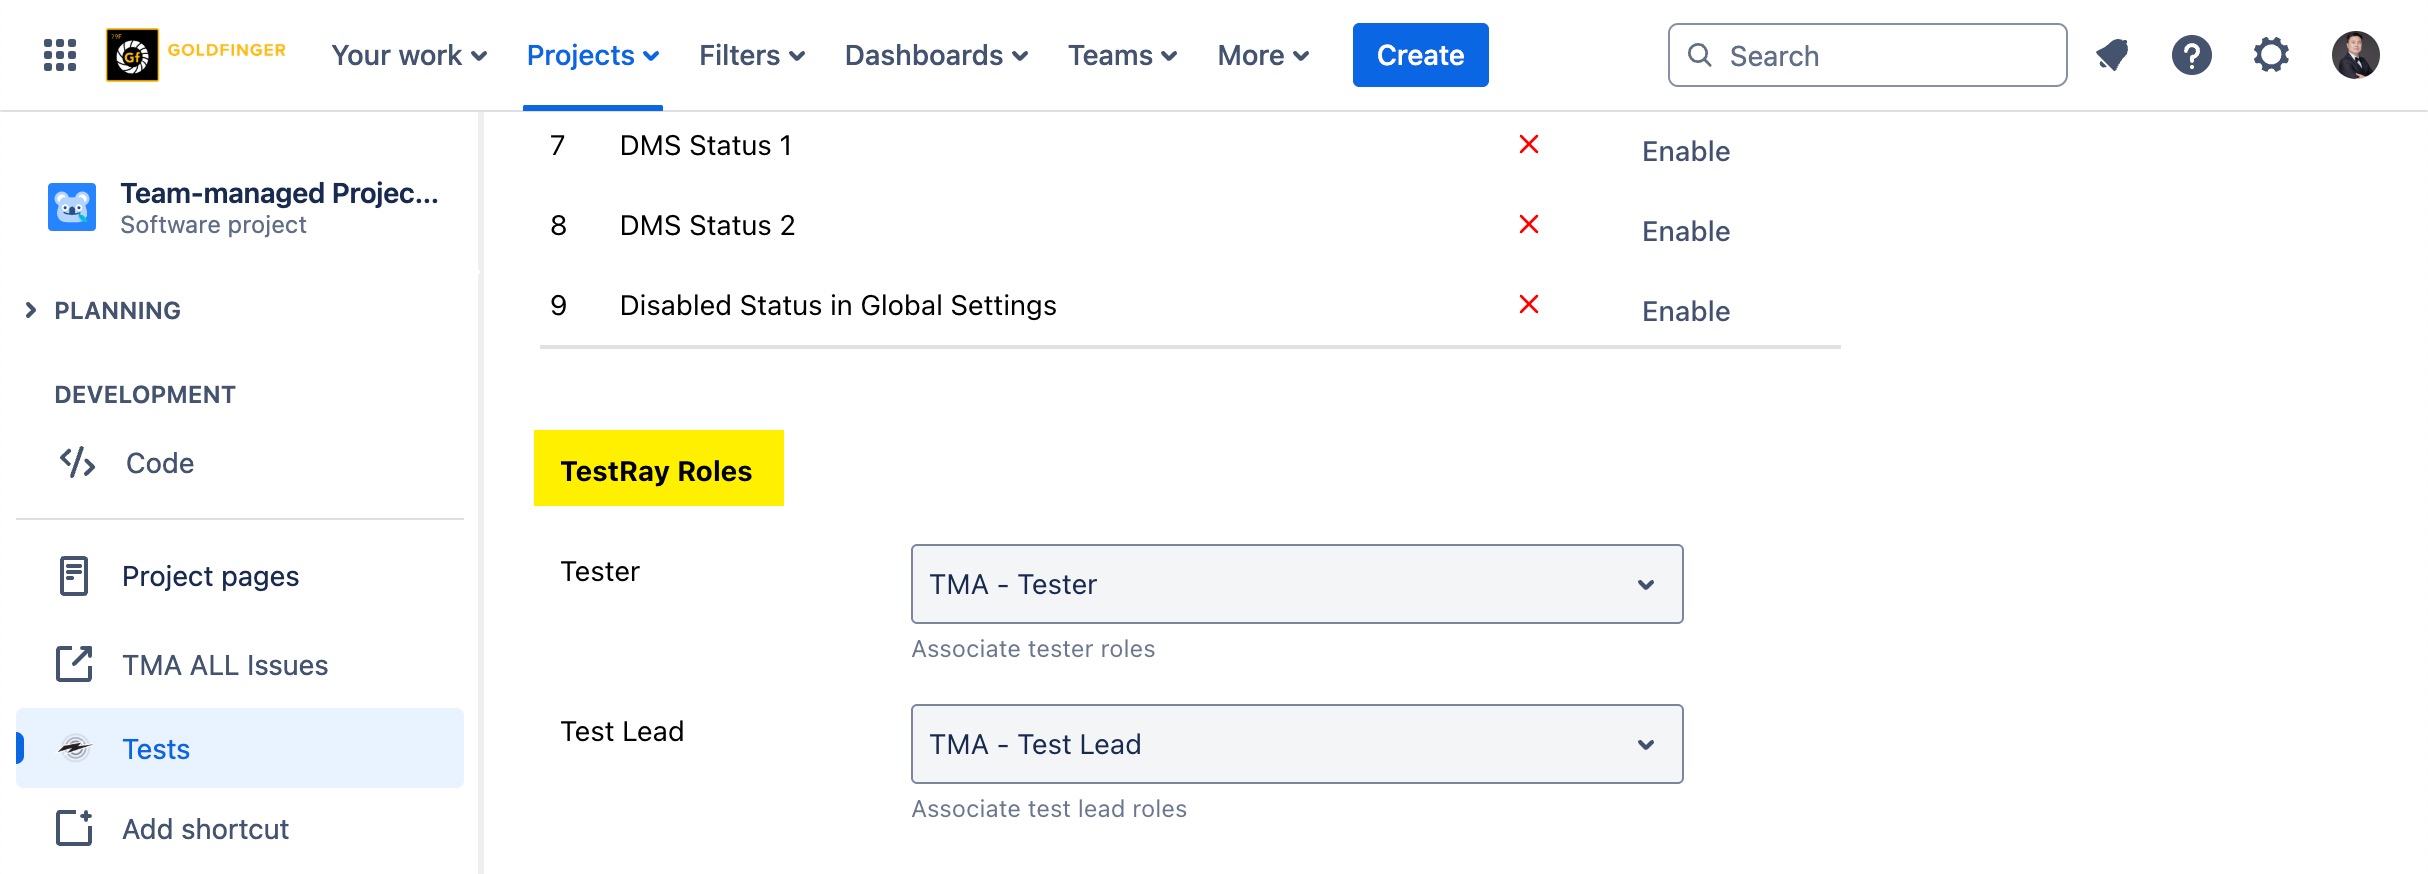
Test Run Status
Next, you can choose the ‘Test Run Status’ those will be available in this project.

TestRay Roles
Next, map your project role to TestRay roles.
You may need create your own project roles first in Jira native ‘Project Settings’.
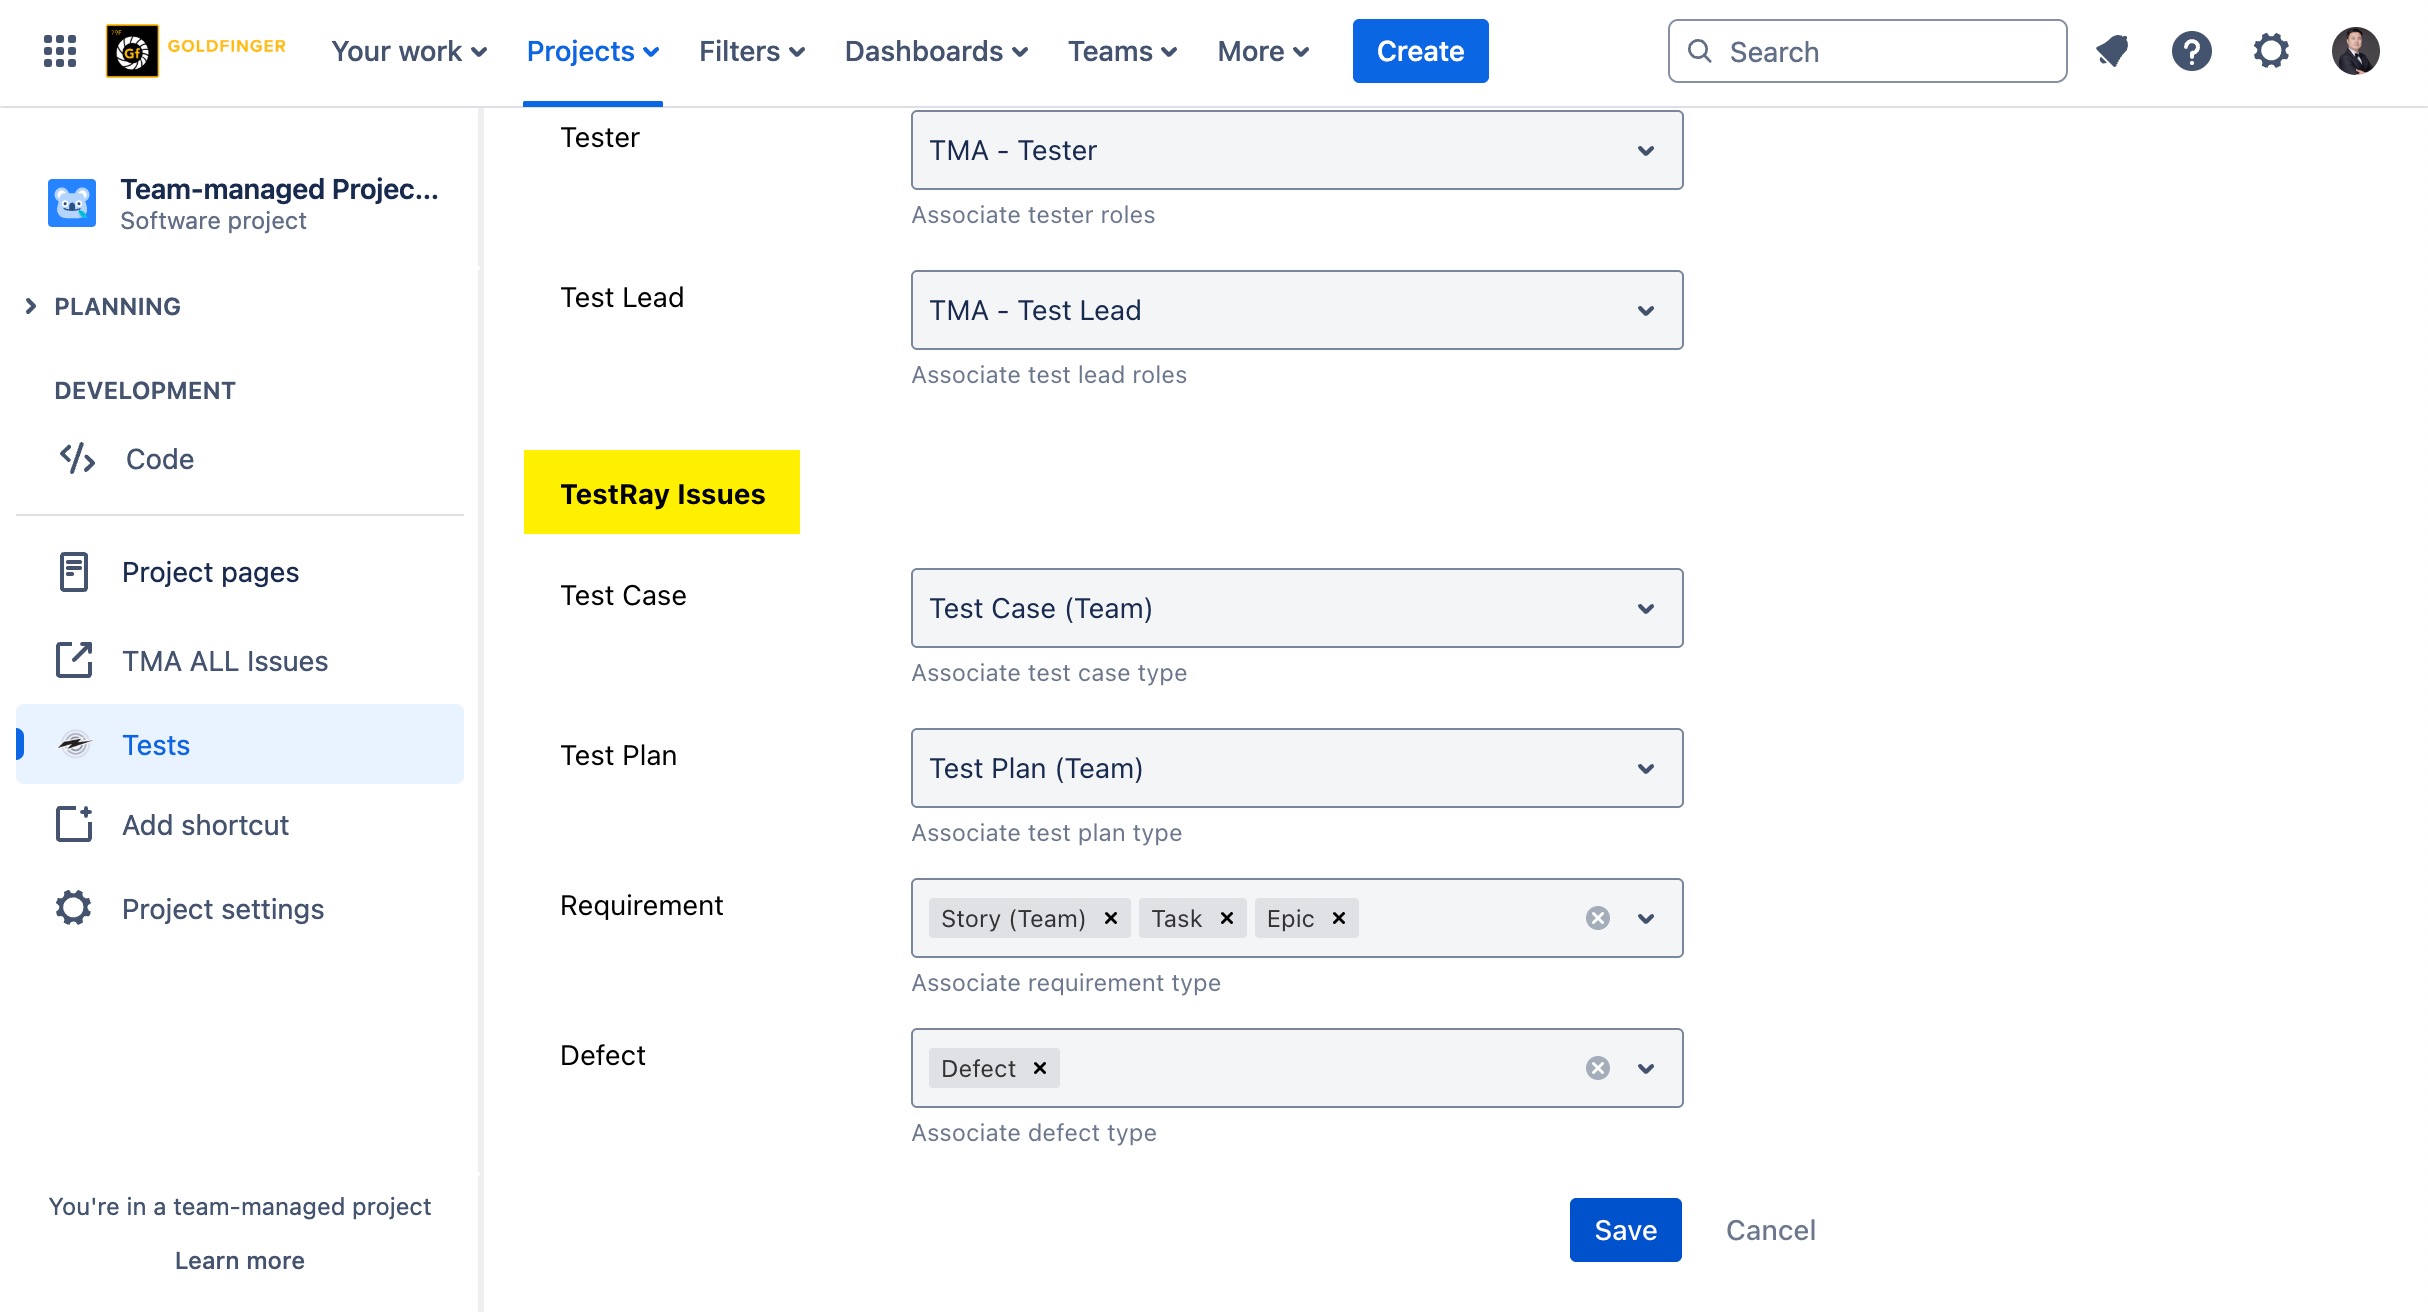
TestRay Issues
Lastly, map your issue types to corresponding TestRay issue types.
You may need create your own issue types first in Jira native ‘Project Settings’.