.png)
Creating/Linking Test Case to Requirement
Make sure you have “Test Case” issue type added in the project from where the test case needs to be created.
Creating Test Case from Requirement
Launch a requirement issue.
Switch to “Test Case” tab from “Requirement Details” panel.

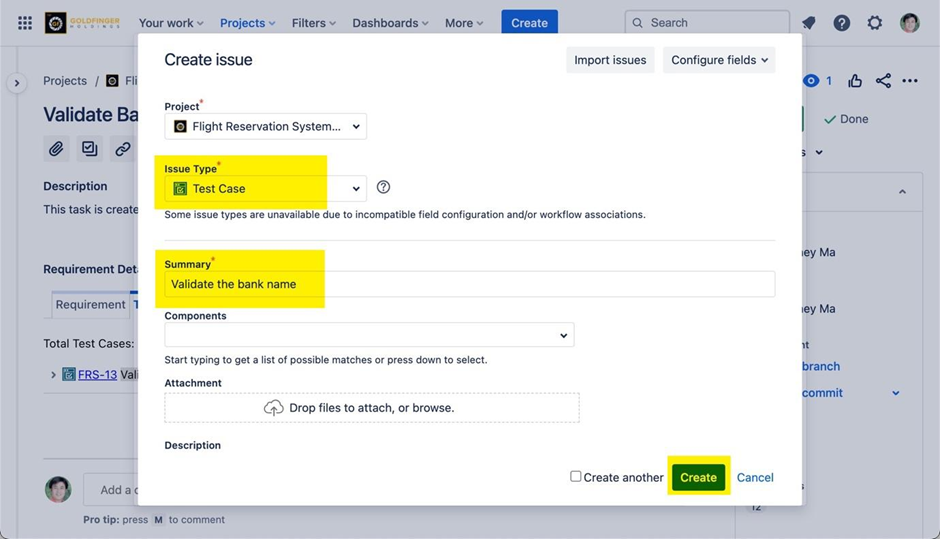
Click “Create Test Case” button. The “Create issue” dialog opens.
Enter the summary and other necessary information.
Click “Create” button, the requirement issue is created successfully.
The created test case issue will be connected to this requirement automatically.
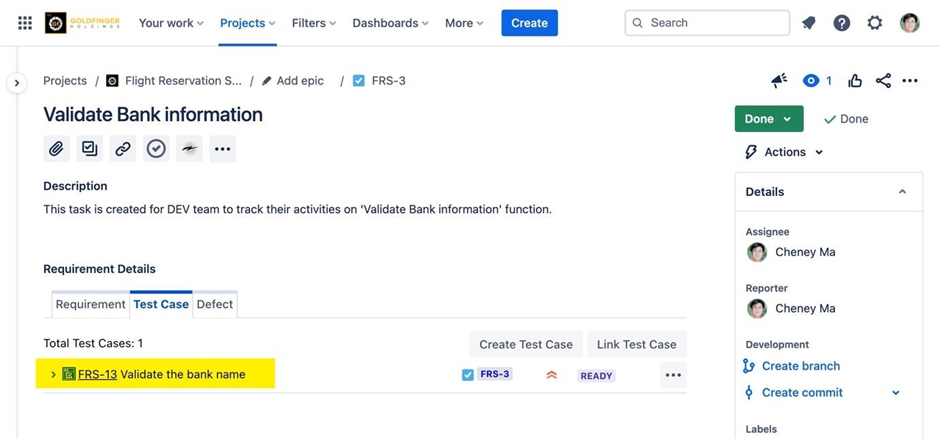
You can also use “Link Test Case” button to link an existing test case to this requirement.
Checking Test Case Execution History
Note: Make sure that the test case has been executed at least once so that execution history is generated.
Click the button adjacent to the test case to expand the test case.
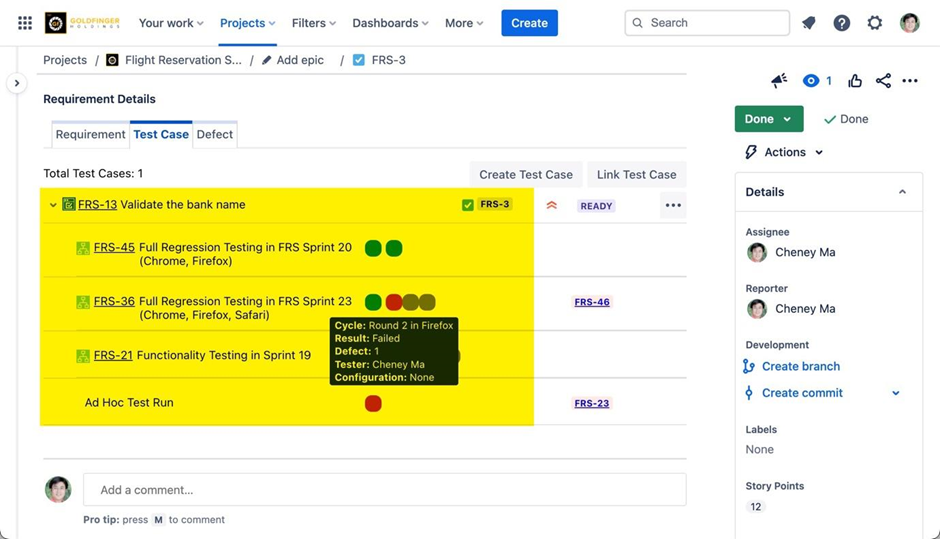
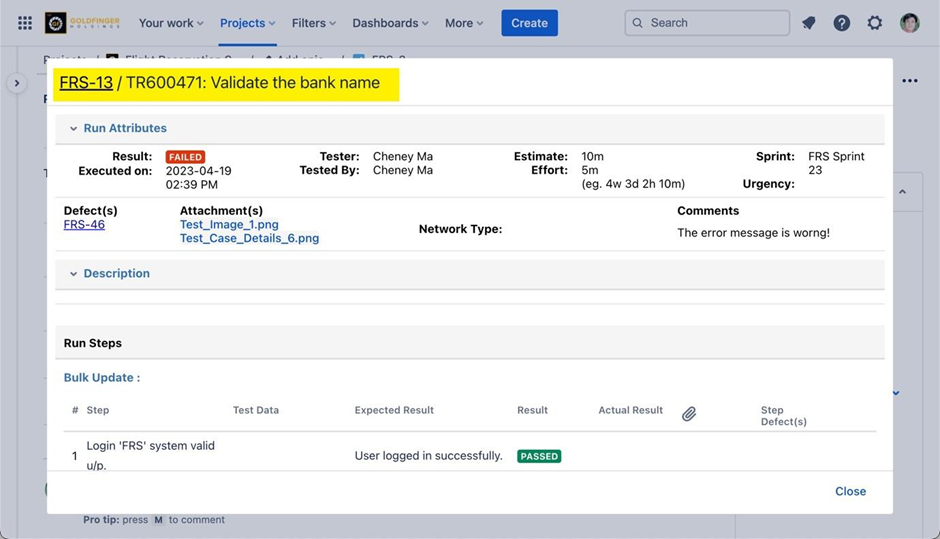
Note: You can view details about the test plans as well as the results. For results, hover the mouse over the result icon. To get more details, click on the “Result” icon. It will launch the execution details with more information.
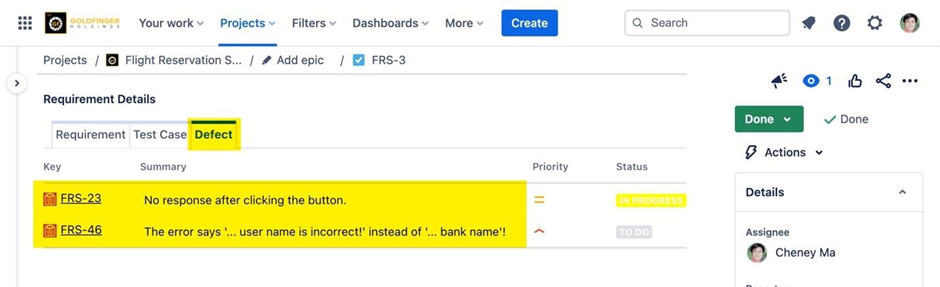
Checking Requirement Related Defects
Note: Make sure that there are test cases connected to requirement, and there are defects reported against the test cases during executions.